cookies

Lemon Myrtle Shortbread – thermomix

Lemon Myrtle Shortbread by Serena

  • Servings: Approx 24 small
  • Difficulty: easy
  • Print

Ingredients:

225 g butter softened (room temp)

65 g YIAH lemon myrtle and white chocolate powder

255 g plain flour

Method:

Preheat oven to 350d

Add butter and lemon myrtle powder to bowl. Mix for 5s, speed 6. Scrape down. Mix for a further 15s, speed 4. Scrape down. add flour and knead on interval speed for 30s.

scrape out of bowl onto a counter dusted with powdered sugar. Pull off 20g pieces and roll into balls (or roll out 1/4 inch thick and cut out using cutter)

place balls on a lined or greased baking tray about an inch apart. Slightly flatten the balls with the tines of a fork or your fingers. Bake for 16-18 min, turn tray 180d halfway through cooking if browning unevenly. They should be just golden around the edge and paler in the middle. Leave to cool on trays.

Once completely cooled decorate with a drizzle of glacé icing (1 tsp water added to 100g of icing sugar ) pop it in a ziploc bag, snip the tiniest bit off the corner and it’s the perfect little piping bag. For added texture and to turn these into something extra special (see photo of gift boxed shortbreads) …before the glacé icing sets, sprinkle some lemon myrtle, white chocolate and cranberry dukkah over the biscuits

My YIAH page is here : http://www.serenalancaster.yourinspirationathome.com.au

*the links above link to my YIAH sales page where you can buy the products I use. This gives me a commission as I am a consultant for YIAH. Saying that, if you want to omit those products, here is how:

use straight forward icing sugar instead of YIAH powder, add some zest of lemon and lime to the bowl at the same time as the flour and add some lime zest to the glacé icing and call them key lime shortbreads 🙂 possibilities with this base recipe are endless.

note:

(use pure icing sugar, cheap icing sugar is cut with tapioca starch or cornflour which can cause your shortbreads to distort as it causes them to expand)


Chocolate Bottom Hob Nob Biscuits (thermomix)

I lived in the UK for about ten years. In that time I worked at pubs, restaurants and clubs in many kitchens and sampled many of the great dishes that were on offer.

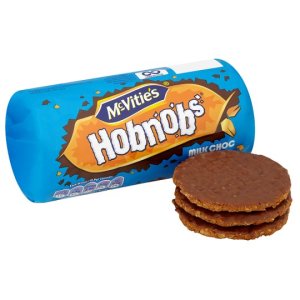
I also discovered McVities biscuits. Digestives and Chocolate Hobnobs.

Lidoff_540x540

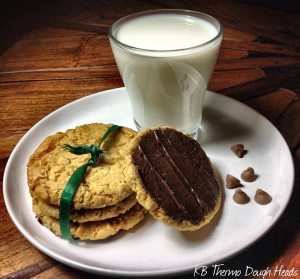
The hob nobs are like buttersnap biscuits with milk chocolate bottoms. o. m. g Anyway, buying them  in Australia is expensive, so I made my own and they are just as good as the original.

Clone Mcvities Chocolate Hob Nobs Biscuits by Serena

  • Servings: not enough!
  • Difficulty: easy
  • Print

choc bottom hobnob

Ingredients:

  • 140g butter
  • 140g white sugar
  • 1 TBSP milk
  • 1 TSP golden syrup (yes, teaspoon!)
  • 1 TSP bicarb (baking) soda
  • 140g self raising flour
  • 110g rolled oats (not quick oats)

Choc bottom:
100g chocolate, cooking, melts or chips

Method:

Preheat oven to 150 degrees Celsius, 300 degrees Fahrenheit or Gas Mark 2.

Line a large baking tray with Glad Bake or a Silicone cooking mat and set aside.

Add 140g butter and 140g sugar to TMX/ Processor bowl.

Mix for 5s, Speed 6.

Scrape down and mix for 40s speed 4.

Add the rest of the ingredients:
1 TBSP milk
1 TSP golden syrup (yes, teaspoon!)
1 TSP bicarb (baking) soda
140g self raising flour
110g rolled oats (not quick oats)
to the bowl with the butter and sugar. Mix for 20s on reverse speed 3. Scrape down and mix for a further 10 sec, Reverse speed 2.

Form in to 19 balls. If you want to have the biscuits all the same size, weigh each ball to 30g. The last one may only be 24 grams, I recommend eating that one when they come
out of the oven, and maybe 15 of the other ones, just for the purpose of testing.
Do not flatten the balls.  Place them on the baking sheet approx 2 inches away from each other and the sides of the pan.

Put on shelf in the middle of the preheated oven and set timer for 25 minutes.

Biscuits should be golden brown. They may require a couple minutes more or less so watch them for the last 5 minutes.

Leave them on the tray for 5 minutes to harden up so you can transfer them to a wire rack to cool completely.

Whilst your biscuits are baking, prepare the chocolate for the bottoms. If you wish to use the thermomix, ensure the chocolate is cut up in more manageable pieces if its a bar. Add to bowl and work up to speed 8 or 9 over 30s to a minute.
You want the chocolate to be almost powder. Melt on 50 degrees, speed 2 until there are no visible signs of unmelted chocolate.

If you don’t wish to use the thermomix, place a small bowl over another bowl or dish of boiling water. Add your
chocolate to the small bowl and let sit, stirring occasionally. Do not let the bowl of chocolate touch the boiling water. Check after a few minutes, and replace water if not quite melted enough.

Flip the biscuits over to the flat bottom, take a tsp of melted chocolate and cover the bottom of the biscuit in any design you choose. The biscuit is very rich and buttery so only a small amount of choc is the go. Leave the biscuits chocolate side up to cool and harden. Store in a ziploc bag or air tight container.

*Tip: form the dough into perfect balls and don’t flatten at all to get a perfect round biscuit.