Thermomix Recipes

Passionfruit Baked Cheesecake TMX by Serena

Passionfruit Baked Cheesecake

  • Servings: 16
  • Difficulty: easy
  • Print

Base Ingredients:

  • 200g Sweet biscuits of choice (I used Nice)
  • 70g melted butter

Filling Ingredients:

  • 500g Philadalphea cream cheese
  • 400ml container sour cream
  • 30g sugar
  • 2 eggs
  • 1 tbsp lemon juice

Glaze Ingredients:

  • 170g tin passionfruit pulp
  • 1 tbsp gelatine
  • 1/2c juice of choice

Method:

Preheat oven to 150 degrees (140dg fan forced). Lightly grease a 20cm clipform tin with butter. Line the sides only with strips of greaseproof paper.

Place butter in TMX bowl. Melt on 100d, 2min, Speed 1.

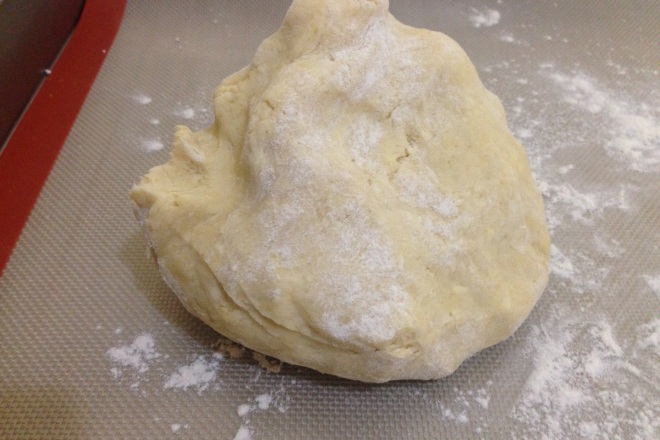
Break up biscuits by hand and add to melted butter in bowl. Process for 8 seconds or until a fine crumb is achieved.

Push biscuit mix into the greased pan and lightly press down, and smooth with the back of a spoon until level and lightly compacted. Place in oven for ten minutes. Remove, set aside to cool.

Ensure Cream cheese is at room temperature. Add both packs to Clean TMX bowl and the 30g sugar, Mix for 1 min, Sp 4. Scrape down. Add 2 eggs, 400ml Sour cream, 1 tbsp lemon juice and mix for 2 min, sp 4. Scrape down and mix for 1 min Sp 5.

The mixture will be thick. Dollop mixture over the crumb base and use the back of a spoon to smooth over it without disturbing the crumb. Level it out until flat on top. Place the pan into the 150 deg oven, middle shelf and bake undisturbed for 50 minutes. Open the oven and gently move the cheesecake pan, if its firm with a sligh wobble right in the middle, its done. If not, close the door and leave ten minutes more. Turn the oven off and leave the door slightly ajar. Leave the cheesecake in there undisturbed for at least two hours, preferably until completely cool.

Make the passionfruit glaze by dissolving 1tbsp of gelatine in 1/4 boiling water. Add the dissolved mixture to 1 (170g) tin of passionfruit pulp and 1/2c of your juice of choice. I used a concentrated mango and ginger syrup made up to 1/2 cup with water. Mix well together and place in fridge until its almost set, but you are still able to pour it. (tip, if you have let the jelly set too much, warm in the microwave for 2 seconds to loosen up)

Take the cooled cheesecake and leaving it in the tin, pour the thick jellified liquid over the top, thickness of the glaze is to personal taste. Place in the fridge to set firmly, about an hour. Remove from fridge, release side clips and carefully life the outer ring off. Carefully peel off greasproof. Use a hot, dry knife to slice 16 pieces.

Aubergine & Lemon Risotto (Thermomix) by Serena

Risotto is such a great main dish, or side. I had this as my main meal with some super crisp broccoli and my husband had a whopping great steak with a side of this risotto and he loved it. Of course I didn’t tell him it had Aubergine in it. Ha! The Aubergine is cooked down and goes creamy and sweet, you would never know its there.

Its a bit of extra time to scorch the Aubergine first but it needs to be done for the smokey flavour. I scorched the Aubergine and fried off the cubes the day before and finished this dish the next day.

So here we go, the recipe:

Aubergine and Lemon Risotto

  • Servings: 6
  • Difficulty: easy
  • Print

Ingredients:
2 medium aubergines
60g olive oil
Tsp of salt to sprinkle

50g parmesan

Peel of 1 lemon (reserve juice) no white part please!
1 medium onion, finely chopped
2 garlic cloves

30g olive oil

10g butter

200g risotto rice
100g white wine

1tbsp stock or 2 stock cubes
550g water

20g butter
10g basil leaves, shredded

Method:

Start by burning one of the aubergines on a gas burner. Line the area around the burner with foil, and put the aubergine directly on to a moderate flame and roast for 12-15 minutes, turning frequently with metal tongs until the flesh is soft and smoky and the skin is burnt all over. Keep an eye on them the whole time so they don’t catch fire. The aubergine needs to deflate completely and the skin should burn and break. I set my smoke alarm off doing this. 😂

Remove from the heat and make a long cut through the aubergine. Scoop out the soft flesh while  totally avoiding the skin which is really bitter. Discard the skin, roughly chop the flesh then set aside.

Cut the other aubergine into quite small 1.5cm dice. Fry the aubergine dice in 4 batches until golden and crisp using 15g with each batch. It will soak up the oil instantly. That is normal, just keep frying, it will come good. Transfer to a colander and sprinkle with salt. Leave to cool.

Add your Parmesan cheese and  lemon peel to your tmx bowl and grate 10 sec/speed 10. Transfer into a bowl and set aside.

Place onion into mixing bowl and chop 3sec/speed 5. Scrape down sides of mixing bowl with the spatula. Add 30g olive oil and 10g butter and sauté 3 min/120C/Speed 1.

Insert butterfly whisk. Add risotto rice and sauté 1 min/120C/reverse / speed 1.5 without measuring cup.

Add white wine and sauté 2 min/ Varomsa / reverse / speed 1.5 without measuring cup

Scrape the bottom of the mixing bowl well,with spatula to loosen rice

Add stock, water and all the reserved Aubergine. Again, scrape the bottom of the mixing bowl with the spatula to loosen any stuck rice.

Cook 12 minutes/100 C/ reverse / speed 1.5. Place simmering basket on top of bowl instead of MC.

Transfer into thermo server. Stir in the parmesan and lemon peel and 20g butter. Serve with shredded or torn basil scattered on top.

famous Chooka burger recipe

This is my famous Burger recipe, that has been used at Tjukayirla Roadhouse since we have been here in 2011. I wish I had a dollar for everyone who came through the door and said, “we’ve heard the burgers here are amazing!”  Www.tjukayirlaroadhouse.com.au

image

Famous Chooka Works Burger by Serena

  • Servings: Approx 8 burgers!
  • Difficulty: easy
  • Print

30g parsley
Chop 10 sec / spd8 (might require scraping down halfway through)
Remove and set aside

Without cleaning bowl, add
100 g fresh bread
Mix 10sec/Spd 6 (coarse bread crumbs)

Without cleaning bowl, add
500g mince
20g McCormick bush spices with mountain pepper
100g master foods smokey bbq sauce (or regular ba sauce and 1tsp liquid smoke)
1 egg
1tsp garlic powder
30g dried onions (optional)
Salt and pepper to taste
Mix 20sec/spd6

Add reserved parsley
Reverse mode
Mix 10sec/sp3

Form into 6-8 patties and chuck on the bbq! Turn only once for juicy burgers! They will take approx 3-4 min on each side over med-high heat

to serve as a Tjukayirla works burger, cook bacon, egg and pineapple and pile high with salad as below:

image

Lemon Myrtle Shortbread – thermomix

Lemon Myrtle Shortbread by Serena

  • Servings: Approx 24 small
  • Difficulty: easy
  • Print

Ingredients:

225 g butter softened (room temp)

65 g YIAH lemon myrtle and white chocolate powder

255 g plain flour

Method:

Preheat oven to 350d

Add butter and lemon myrtle powder to bowl. Mix for 5s, speed 6. Scrape down. Mix for a further 15s, speed 4. Scrape down. add flour and knead on interval speed for 30s.

scrape out of bowl onto a counter dusted with powdered sugar. Pull off 20g pieces and roll into balls (or roll out 1/4 inch thick and cut out using cutter)

place balls on a lined or greased baking tray about an inch apart. Slightly flatten the balls with the tines of a fork or your fingers. Bake for 16-18 min, turn tray 180d halfway through cooking if browning unevenly. They should be just golden around the edge and paler in the middle. Leave to cool on trays.

Once completely cooled decorate with a drizzle of glacĂ© icing (1 tsp water added to 100g of icing sugar ) pop it in a ziploc bag, snip the tiniest bit off the corner and it’s the perfect little piping bag. For added texture and to turn these into something extra special (see photo of gift boxed shortbreads) …before the glacĂ© icing sets, sprinkle some lemon myrtle, white chocolate and cranberry dukkah over the biscuits

My YIAH page is here : http://www.serenalancaster.yourinspirationathome.com.au

*the links above link to my YIAH sales page where you can buy the products I use. This gives me a commission as I am a consultant for YIAH. Saying that, if you want to omit those products, here is how:

use straight forward icing sugar instead of YIAH powder, add some zest of lemon and lime to the bowl at the same time as the flour and add some lime zest to the glacĂ© icing and call them key lime shortbreads 🙂 possibilities with this base recipe are endless.

note:

(use pure icing sugar, cheap icing sugar is cut with tapioca starch or cornflour which can cause your shortbreads to distort as it causes them to expand)


Texas Muffins – The best muffin ever (thermomix)


This mix is for the basic muffin, you can make any variation from this basic mix, some ideas are beneath the recipe!

Texas Muffins - Any Flavour by Serena

  • Difficulty: easy
  • Print

Ingredients:

  • 225g self raising flour 150g plain flour
  • 1 Âœ tsp baking powder 60g caster sugar
  • 155g unsalted butter 80g honey
  • 2 eggs 150g milk

Method:

Preheat oven to 200 degrees

In TMX bowl place:

  • 155g butter
  • 80g honey

Mix 2 minutes, speed 2 on 80 degrees

Add:

  • 2 eggs
  • 150g milk

(any wet ingredients from the variations below, banana for example)

Mix 10 seconds speed 4

Add to TMX bowl:

  • 225g SR flour flour
  • 150g plain flour
  • 1 Âœ tsp baking powder
  • 60g caster sugar

(any dry ingredients from the variations below, nuts for example)

Put lid on, mix for 10 seconds speed 4, scrape down, mix for a further 5 seconds speed 4. Do not overmix or you will end up with heavy dense muffins. The flour should only just be incorporated

Line your Texas muffin tin (6 large hole muffin tin) or a normal muffin tin (12 hole) if using with muffin cups.

Divide filling out between cups, the texas muffin pan will be piled high in the case. This is normal to achieve the signature big dome of a texas muffin. Bake for 20-25 minutes. Set your timer for 15 minutes and check them at 5 minute intervals. You want them just done so they aren’t dry. If they spring back in the middle, they are done (or insert a skewer to test)

Variations:

Apple & Cinnamon :

  • Add to dry: 2 tsp cinnamon, 1 tsp nutmeg.
  • Add to wet: 3 green apples, peeled and diced.
  • After putting batter in tins, sprinkle top with a mixture of 2 tbsp caster sugar and 1 tsp cinnamon

White Chocolate and Raspberry/Blueberry:

  • Add to dry: 100g white chocolate chopped
  • Add to wet: 150g frozen or fresh raspberries or blueberries

Double Choc Chip:

  • Add to dry: 3 tsp cocoa, 150g choc chips

Blueberry:

  • Add to wet: 200g fresh or frozen blueberries

Orange poppy seed:

  • Add to dry: 2 tbsp poppy seeds
  • Add to wet: zest of one large orange and the juice of that orange, squeeze straight in to bowl

Coffee, Banana & Choc Chips SO YUMMMMMM!!!

  • Add to dry: 3 tsp Instant coffee powder, grind first if you use granulated instant coffee or add 50g of real coffee made up to wet ingredients, and 100g choc chips
  • Add to wet: 1 large banana

Chocolate Bottom Hob Nob Biscuits (thermomix)

I lived in the UK for about ten years. In that time I worked at pubs, restaurants and clubs in many kitchens and sampled many of the great dishes that were on offer.

I also discovered McVities biscuits. Digestives and Chocolate Hobnobs.

Lidoff_540x540

The hob nobs are like buttersnap biscuits with milk chocolate bottoms. o. m. g Anyway, buying them  in Australia is expensive, so I made my own and they are just as good as the original.

Clone Mcvities Chocolate Hob Nobs Biscuits by Serena

  • Servings: not enough!
  • Difficulty: easy
  • Print

choc bottom hobnob

Ingredients:

  • 140g butter
  • 140g white sugar
  • 1 TBSP milk
  • 1 TSP golden syrup (yes, teaspoon!)
  • 1 TSP bicarb (baking) soda
  • 140g self raising flour
  • 110g rolled oats (not quick oats)

Choc bottom:
100g chocolate, cooking, melts or chips

Method:

Preheat oven to 150 degrees Celsius, 300 degrees Fahrenheit or Gas Mark 2.

Line a large baking tray with Glad Bake or a Silicone cooking mat and set aside.

Add 140g butter and 140g sugar to TMX/ Processor bowl.

Mix for 5s, Speed 6.

Scrape down and mix for 40s speed 4.

Add the rest of the ingredients:
1 TBSP milk
1 TSP golden syrup (yes, teaspoon!)
1 TSP bicarb (baking) soda
140g self raising flour
110g rolled oats (not quick oats)
to the bowl with the butter and sugar. Mix for 20s on reverse speed 3. Scrape down and mix for a further 10 sec, Reverse speed 2.

Form in to 19 balls. If you want to have the biscuits all the same size, weigh each ball to 30g. The last one may only be 24 grams, I recommend eating that one when they come
out of the oven, and maybe 15 of the other ones, just for the purpose of testing.
Do not flatten the balls.  Place them on the baking sheet approx 2 inches away from each other and the sides of the pan.

Put on shelf in the middle of the preheated oven and set timer for 25 minutes.

Biscuits should be golden brown. They may require a couple minutes more or less so watch them for the last 5 minutes.

Leave them on the tray for 5 minutes to harden up so you can transfer them to a wire rack to cool completely.

Whilst your biscuits are baking, prepare the chocolate for the bottoms. If you wish to use the thermomix, ensure the chocolate is cut up in more manageable pieces if its a bar. Add to bowl and work up to speed 8 or 9 over 30s to a minute.
You want the chocolate to be almost powder. Melt on 50 degrees, speed 2 until there are no visible signs of unmelted chocolate.

If you don’t wish to use the thermomix, place a small bowl over another bowl or dish of boiling water. Add your
chocolate to the small bowl and let sit, stirring occasionally. Do not let the bowl of chocolate touch the boiling water. Check after a few minutes, and replace water if not quite melted enough.

Flip the biscuits over to the flat bottom, take a tsp of melted chocolate and cover the bottom of the biscuit in any design you choose. The biscuit is very rich and buttery so only a small amount of choc is the go. Leave the biscuits chocolate side up to cool and harden. Store in a ziploc bag or air tight container.

*Tip: form the dough into perfect balls and don’t flatten at all to get a perfect round biscuit.

Puritans Vanilla Cake (Thermomix) by Serena

11722556_10154602629601959_4222634939386325640_o 11722493_10154593611991959_6024628186486662876_o 11411949_10154593457826959_5503017384392131423_o image

Puritans Vanilla Cake (Thermomix) - by Serena

  • Servings: 2 x 20cm round cakes or 12 x cupcakes and 1 x 20cm round cake
  • Difficulty: easy
  • Print

Notes: A moist fluffy vanilla cake sturdy enough to shape for birthday cakes. Stays moist for days.

Ingredients:

  • 150g shortening (see my blog post HERE about where to buy)
  • 300g caster sugar
  • 3 large eggs
  • 1.5 teaspoons vanilla
  • 0.5 teaspoon salt
  • 3.5 teaspoons baking powder
  • 325g plain flour
  • 400g milk

Method:

Preheat your oven to 180 degrees (160 if fan forced)

Place your oven rack in the cooler part of the oven, generally the middle

Grease & flour 2 x 20cm round cake pans. *Note – I do this the old fashioned way, with real butter and then lightly flour the pan. You can use liners (but make sure you grease first).. but the crumb is much better the old fashioned way.

For this recipe, I like to pre weigh the ingredients and place in bowls as there are so many steps and I get side tracked easily! You don’t have to do that though and can ignore the Prep section If you don’t get sidetracked like me!!

Prep:

Set out 7 small bowls;

1st bowl – 300g sugar

2nd bowl – crack three large eggs in and 1.5 tsp vanilla – lightly beat with a fork

3rd bowl – 130g plain flour + 3.5 tsp baking powder + 0.5 tsp salt

4th bowl – 200g milk

5th bowl – 130g plain flour

6th bowl – 200g milk (yes, a second lot as you add it at separate times)

7th bowl – 65 g plain flour

Now you can begin the recipe:

Insert butterfly and leave in for entire recipe. MC off for entire recipe

  1. Add 150g room temperature shortening to bowl
  2. Mix 10 sec/ Spd 4
  3. Scrape Down
  4. Mix 10 sec/ Spd 4
  5. Scrape down

Set timer for 2 min/ Spd 3 and turn on

  1. Add your bowl of 300g sugar steadily over the first 1 minute 30 then leave to blend for final 30 sec.
  2. Scrape down

Add the bowl of 3 lightly beaten eggs and 1.5tsp vanilla

  1. Mix for 1 min/ Spd 3
  2. Scrape down
  3. Mix 30 sec/ Spd 3
  4. Scrape down

Add the bowl of 130g flour, 3.5tsp baking powder and 0.5 tsp salt

  1. Mix 30 sec/ Spd 2
  2. Scrape down really well
  3. Add 200g milk
  4. Mix 30 sec/ Spd 2
  5. Scrape down really well

Add your second bowl of 130g flour

  1. Mix 30 sec/ Spd 2
  2. Scrape down really well
  3. Add 200g milk
  4. Scrape down really well
  5. Add final bowl of 65g flour
  6. Mix 15 sec/ Spd 2

Turn off machine. Remove bowl and scrape down well with spatula and give a final couple of mixes by hand to ensure all flour is incorporated.

Pour/scrape batter which is very thick into your two 20cm pans. I always weigh my pans to ensure the batter is evenly divided. Bake for approx. 35 minutes. Set your times for 30 minutes and check every 5-8 minutes. The cake should be golden in colour and begin to pull away from the sides. If you touch the top it should spring back. To be absolutely sure, insert a toothpick or skewer in the top right down to the bottom and withdraw. It should have no batter stuck to it.

Some notes*

The batter is very thick and may appear to be slightly separated or curdled. That is from the shortening mixing with the milk/butter. Do not be tempted to mix the cake further to correct, it will bake just fine.

Butter can be substituted for the shortening but it will make the cake heavier and IMO is not nearly as nice. The shortening in this cakes keeps it moist and light. Do not be concerned about using up your shortening, you can substitute it in pretty much any cake and it should be a staple in your house for pastry and baking

Cool the cake for 10-15 minutes in the pan before attempting to remove it. If you rush this the cake will break on you.

Baking is very fickle, be careful before you change ingredients or alter amounts, unlike savoury cooking there is very little margin for error in baking.

If you like this recipe, let me know in the comments. If you have tweaked it and it’s been a success – let us know. If you have tweaked it and it’s failed miserably, you are welcome to keep that to yourself. 🙂

In the pictures below, the pink cake has a white chocolate sorbet icing. I used white chocolate sorbet powder – 3 tbsps. added with the icing sugar in my White Chocolate Mr Whippy Icing. If you would like to purchase the powder, click HERE (Please note I am a consultant for YIAH – Your Inspiration at Home and I would love to help you use your powders/ spice blends etc – feel free to pm me for ideas)

The yellow cake has white chocolate lemon myrtle icing – the white chocolate lemon myrtle powder is one of my favourites – I add it to mayonnaise for my chicken burgers – to buy it, click HERE follow the menus to access all the great YIAH products on offer – you will be amazed!

11755870_10154602804116959_9184173271211400207_n image 11722653_10154602863791959_6952666687119944595_o

White Chocolate Mr Whippy Frosting (Thermomix) by Serena

Here it is, the Mr Whippy Frosting, converted for Thermomix. This is my version of the famous icing made by the Magnolia Bakery in New York.

I coloured this icing on this occasion but it’s a lovely pale off white and can be used like that. This recipe is not a simple 2 minute buttercream. The danger is that the residual heat of the Thermomix can melt the delicate structure so it is done over ten minutes with lots of stops and starts to keep the temperature down. My kitchen is quite cold. In summer or very warm kitchens you may need to pop in the fridge every couple of minutes for 30seconds to keep the core temp down.

White Chocolate Mr Whippy Frosting (Thermomix) by Serena

  • Servings: a bucket load of icing
  • Difficulty: medium, requires patience
  • Print

Ingredients:

  • 375g butter
  • 255g melted and cooled white chocolate
  • 1 heaped tbsp coconut oil (solid) or 1.5tbsp coconut oil if liquid
  • 20g milk
  • 1 tsp vanilla
  • 320g icing sugar

Method:

Melt the white chocolate and coconut oil using the double boiler method [put an inch of water in a saucepan and bring to the boil, turn down to simmer. Set a bowl over the saucepan so it is snug but the bowl doesn’t come into contact with the water underneath. break your chocolate up in pieces and put in the bowl. Add the oil. Stir often).

It will only take 2 minutes to melt this chocolate. Take the bowl off the saucepan and away from the heat when it’s 95% melted and keep stirring until it’s smooth. Transfer to another bowl or container to cool.

Place butterfly whisk in mixing bowl.

Add roughly chopped cool/ room temperature butter  to the mixing bowl. Mix on speed 3 -4 for 20 seconds. remove cover and scrape down sides, push icing onto butterfly. Repeat the mixing and scraping step 6 more times until you get a silky smooth whipped butter effect as in this below picture.

image

When it when it looks like this, add the 20g milk mix on speed 2 for 20second until well incorporated. Use silicone spatula to scrape down sides.

Add vanilla and mix on speed 2 for 20 seconds. Scrape down sides. Repeat mixing and scraping step 4 more times or until it looks like this:

image

Add the completely cooled chocolate but be careful not to add any hard or crunchy bits. if it has started to harden, microwave for 2 secs at a time until it is loose again. Mix for 20 sec / Speed 3. Scrape down sides. Repeat mix and scrape 3 more times.

Add 100g icing sugar and mix for 30 seconds on speed 3. Scrape down bowl. Add another 100g of icing sugar and mix for 30 seconds on speed 3. Scrape down bowl. Add the final 120g icing sugar and mix for 30 seconds on speed 3.

image

Add colouring (I use and recommend Ameri-colour gels) and give it a final mix for 1 min/ speed 1

image

Remove the blade and mix by hand with a spatula the bit of butter and icing sugar on the sides and clinging to the butterfly into the mix

image

Now you just have to youtube the famous Magnolia Bakery cupcake swirl and practice practice – it’s harder than it looks!!!

No Fail Short Crust Pastry – (Thermomix) Sweet or Savoury by Serena

My short crust pastry never fails me. It also doesn’t need to go in the fridge for a decade before you can use it. Ok, its 30 minutes but MY GOD, how long is that 30 minutes???

No Fail Short Crust Patry

  • Servings: 1 top and bottom 20cm pie crust
  • Difficulty: easy
  • Print

Ingredients:

  • 400g plain flour
  • 100g frozen cubed butter
  • 100g frozen cubed shortening (Frymasta Edible Veg Shortening from Coles is Ideal)
  • 2 egg yolks
  • 1 tsp salt for savoury pastry or 30g sugar for sweet pastry
  • 1/4 to 1/2 cup iced water

Method:

In a measuring jug, add half a dozen ice cubes and cold water up until the 1/2 cup mark

Weigh 400g flour into your TMX bowl. Add 1 tsp salt if making savoury pastry or 30g sugar If making sweet pastry. Pulse (turbo) twice to mix.

Add 100g frozen butter and 100g frozen shortening

Mix on speed 4 for 10 seconds. Check consistency. It should be like fine breadcrumbs. If not, do a further 5 seconds.

Add both egg yolks and 1/4 c ice water. Mix on speed 6 for 10 seconds. Check that its coming together in clumps. Set timer for 20 seconds and turn to speed 6. Dribble ice water in through the centre hole slowly until all the pastry gathers in a lump around the centre blade. Turn off the machine and turn upside down. Release the blade and let the pastry and blade come out onto a floured surface. Your pastry will be slightly sticky, that’s ok. remove the blade and knead a couple of times quickly on the flour until the pastry isn’t sticky.

This pastry is ready to be rolled. If you are not going to use is straight away, store in fridge or freezer. The reason it doesn’t have to rest is because its so cold from the frozen fats.

Notes* You can do this with room temp or cold butter and shortening but you would need to chill it before rolling and then chill it again before baking to stop it shrinking. I wouldn’t recommend room temperature fats for pastry. I keep cubed frozen shortening and butter in my freezer at all times for pastry

If you do any of my recipes and it hasn’t worked for you, please contact me. If you have made any of my recipes and loved them, please don’t forget to leave a note on my blog, especially if you have made some tweaks that have worked out! Thank you!

Serena x

Here are some of my favourite things to make with my pastry

IMG_1823 IMG_1824 IMG_1825

Pepper Steak  Swags

Pepper Steak Swags

Pepper Steak Swags

Pepper Steak Swags

Cornish Pasty – (Thermomix) by Serena

Cornish_pasty_-_cut

I spent ten years in England. I went for a holiday and liked it so much I just stayed (there was quite a bit of Immigration trouble at the time but I’ll just skim right past that) 😜

Anyway, after s brief stint in Robin Hood’s back yard, Nottinghamshire – I ended up in Cornwall. Home of the revered Cornish Pasty.

A Cornish pasty of course is a half moon shaped pastry filled with meat and vegies. Sometimes people roll them upright, its a personal thing. The pastry is crimped and its deliciously moist and flaky.

I learned to make Cornish pasties from a lady born and bred in Cornwall. In fact she had never left Cornwall, and was quite proud of that fact! Rita showed me how to make the pastry, what meat to buy and how to crimp. It’s an art, make no mistake and a good pasty is amazing!

Every Cornish person has an opinion on what makes a great pasty but for my purposes, this is the recipe I have been using for the past 20 years and I’m sticking with it!


Cornish Pasty (Thermomix) by Serena

  • Servings: 6
  • Difficulty: easy
  • Print

Ingredients:

  • 400g shortcrust pastry – recipe HERE
  • 300g beef skirt or chuck steak (you can use mince if you prefer)
  • 1 leek
  • 1 swede (turnip- orange skin variety best)
  • 2 potatoes
  • 2 tbsp. gravy powder
  • 6 stalks of parsley
  • 40g butter
  • salt and pepper
  • 1 x egg and bit of milk for egg wash

Prep:

Rollout your pastry to the thickness of a silicone mat, or 1/4cm. Cut out 6 x 20cm circles. I have templates already cut in my pantry from glad bake paper to use as a guide. Stack your circles on a plate, put glad bake between them, cover them with Clingfilm and refrigerate while you prepare the filling

Make your egg wash by whisking a tbsp. of milk into an egg, set aside

Cube your beef skirt, ensure you cut against the grain for tenderness. Set aside

Trim and top and tail your leek so you are left with just a bit of green and mainly white. Discard the green. Yes, I know it’s hard but just do it! Lol. Cut in small 1cm pieces. Add to tmx bowl

Peel your swede and cut in 8 pieces like an orange. Add to tmx bowl

Peel your potatoes and cut in 8 pieces like an orange. Add to tmx bowl

Separate the leaves from your stalks on the parsley, discard stalks. Set parsley aside.

Chop vegetables in your tmx bowl for 2-3 seconds on speed 4. Check consistency, you want it to be small enough to cook in 50-60 minutes but not little pieces. If doing this by hand you would slice the veg the same as for potato bake, so try and get the pieces that sort of size.

Remove veg from bowl and set aside.

Assembly:

Its quite easy to forget what you are doing with this assembly of a pasty, and forget to put in all items. For this reason, I line up on my bench the ingredients in the order they are placed in, so –

Pastry

  • veg mix
  • meat
  • parsley
  • butter
  • gravy powder
  • salt and pepper
  • egg wash

Preheat oven to 180 degrees

Take one pastry circle. Baste around the whole edge with egg wash. You do not want your pasty to leak so ensure you have no holes or tears. In the middle, place a mound of the veg mixture, approx. Leave a good inch of pastry free all the way around for sealing. Don’t make the filling too big or you will have trouble sealing the pasty. Add about a ping pong ball sized amount of meat, along the top of the veg.

Add parsley to the top, lay it over the meat.

Sprinkle over 1/4tsp gravy powder

Put two “dobs” of butter on the top of that (about 1/4 tsp.)

salt and pepper to taste.

Roll your pastry over so you have a half moon shape. Seal the edges together and then crimp the pasty (How to crimp a pasty here). Poke a steam vent in the top somewhere with a knife, just a little hole.. and egg wash the entire pasty.

Place on a lined tray in the middle to lower half of the oven and bake for approx. 50-60 minutes. Let sit for 5 minutes before transferring to a wire rack. Do not attempt to eat one for 15 minutes as you will burn yourself!

If you have not had great success with my recipe please feel free to contact me for help 🙂 If you have had a great result, please leave me a comment and let me know. If you have done tweaks that might help someone else, post them up and share the love! Thanks for visit g my blog 🙂

serena x